Running the DeepHub® Locally
Getting Started
This tutorial is designed for partners and customers as a step-by-step guide when working with the DeepHub®. It includes the following sections:
- System Prerequisites for the DeepHub® - This section provides information on prerequisites of the system in terms of the software tools and technical knowledge needed for the DeepHub® installation.
- Install the DeepHub® - This section provides step-by-step instructions on how to install the DeepHub®.
- User Instructions for the DeepHub® - This section provides essential information on how to operate the DeepHub® from the end user perspective.
System Prerequisites
Docker
Docker is an open-source project for automating the deployment of applications as portable, self-sufficient containers that can run on the cloud or on-premises. Docker image containers can run natively on Linux and Windows. Developers can use development environments on Windows, Linux, or macOS. On the development computer, the developer may run a Docker host where Docker images are deployed.
-
Image: A Docker image is a file, comprised of multiple layers, that is used to execute code in a Docker container. It is a package that contains all necessary files for a containerized application to run. When the Docker user runs an image, it can become one or multiple instances of the container.
-
Container: An instance of a Docker image. A container represents the execution of a single application, process, or service. It consists of the contents of a Docker image, an execution environment, and a standard set of instructions.
-
Docker Compose: A tool for defining and running multi-container Docker applications.
Based on your operating system, you can download and install Docker Desktop here: Docker Desktop. While installing Docker on your machine, ensure you allow the installation to bypass any firewall settings (if prompted). Once the installation process is complete, your machine will restart.
When Docker Desktop is installed on Windows, the entire package is installed (including Docker Compose). With Ubuntu, the user needs to install Docker and the Docker Compose separately.
Windows PowerShell or Command Prompt
A shell is a user interface that gives you access to various services of an operating system. A shell can be command-line based, or it can include a graphical user interface (GUI). Windows PowerShell is a shell developed by Microsoft for task automation and configuration management. It is cross-platform and consists of a command-line shell and scripting language. PowerShell capabilities allow users to simplify and automate repetitive tasks by creating scripts and combining multiple commands. The Windows operating system comes with Windows PowerShell pre-installed. However, Windows PowerShell can be installed for other operating systems here: Windows PowerShell. Aside from Windows PowerShell, the classic Windows Command Prompt is also pre-installed and can be used for tasks at hand.
Terminal for Linux & macOS
A terminal is a program that allows the use of the command-line in a graphical environment. In a Linux system, the shell is a command-line interface that interprets a user’s commands and script files, and notifies the server’s operating system what to do with them. Terminal is pre-installed on Linux and macOS. For more information, please read Ubuntu Tutorials.
Docker and Docker Compose
Using Docker or Docker Compose on Windows and Linux is done via a command line shell and is almost identical on both platforms. You can use PowerShell or Command Prompt on Windows and a shell like bash or zsh on Linux. Refer to DeepHub System Prerequisites for details.
Using Docker or Docker Compose
We recommend using Docker Compose because this way you will get a completely configured "system" consisting of the DeepHub®, the DeepHub® UI and a containerized web server, acting as a reverse proxy, to simplify the overall usage and interaction of these components.
We provide a Docker Compose file that configures the necessary orchestration between these three containers. Refer to the next section in this documentation concerning more details on this.
Nevertheless, you are able to pull just the Docker container that you need instead of all three.
docker pull flowcate/deephub:<tag of release you want to pull>
The DeepHub® itself, as well as the corresponding DeepHub® UI, are available at Docker Hub: Flowcate@docker.
Getting the Latest Docker Compose File
We provide a docker-compose.yml file and additional configuration files for orchestration of the DeepHub® itself, as well as the corresponding DeepHub® UI, in our Github repository: deephub-basic-setup by Flowcate@github.
We recommend creating a dedicated local directory on your filesystem where you store the docker-compose.yml and the aforementioned configuration files which is what happens if you use git clone to pull the complete repository.
The DeepHub® needs to create some additional files during operations and writes them to directories mounted from your host filesystem. This is done relative to the location of the docker-compose.yml file and will therefore happen within some of the directories that are part of the deephub-basic-setup repository.
Explanation of the Docker Compose File
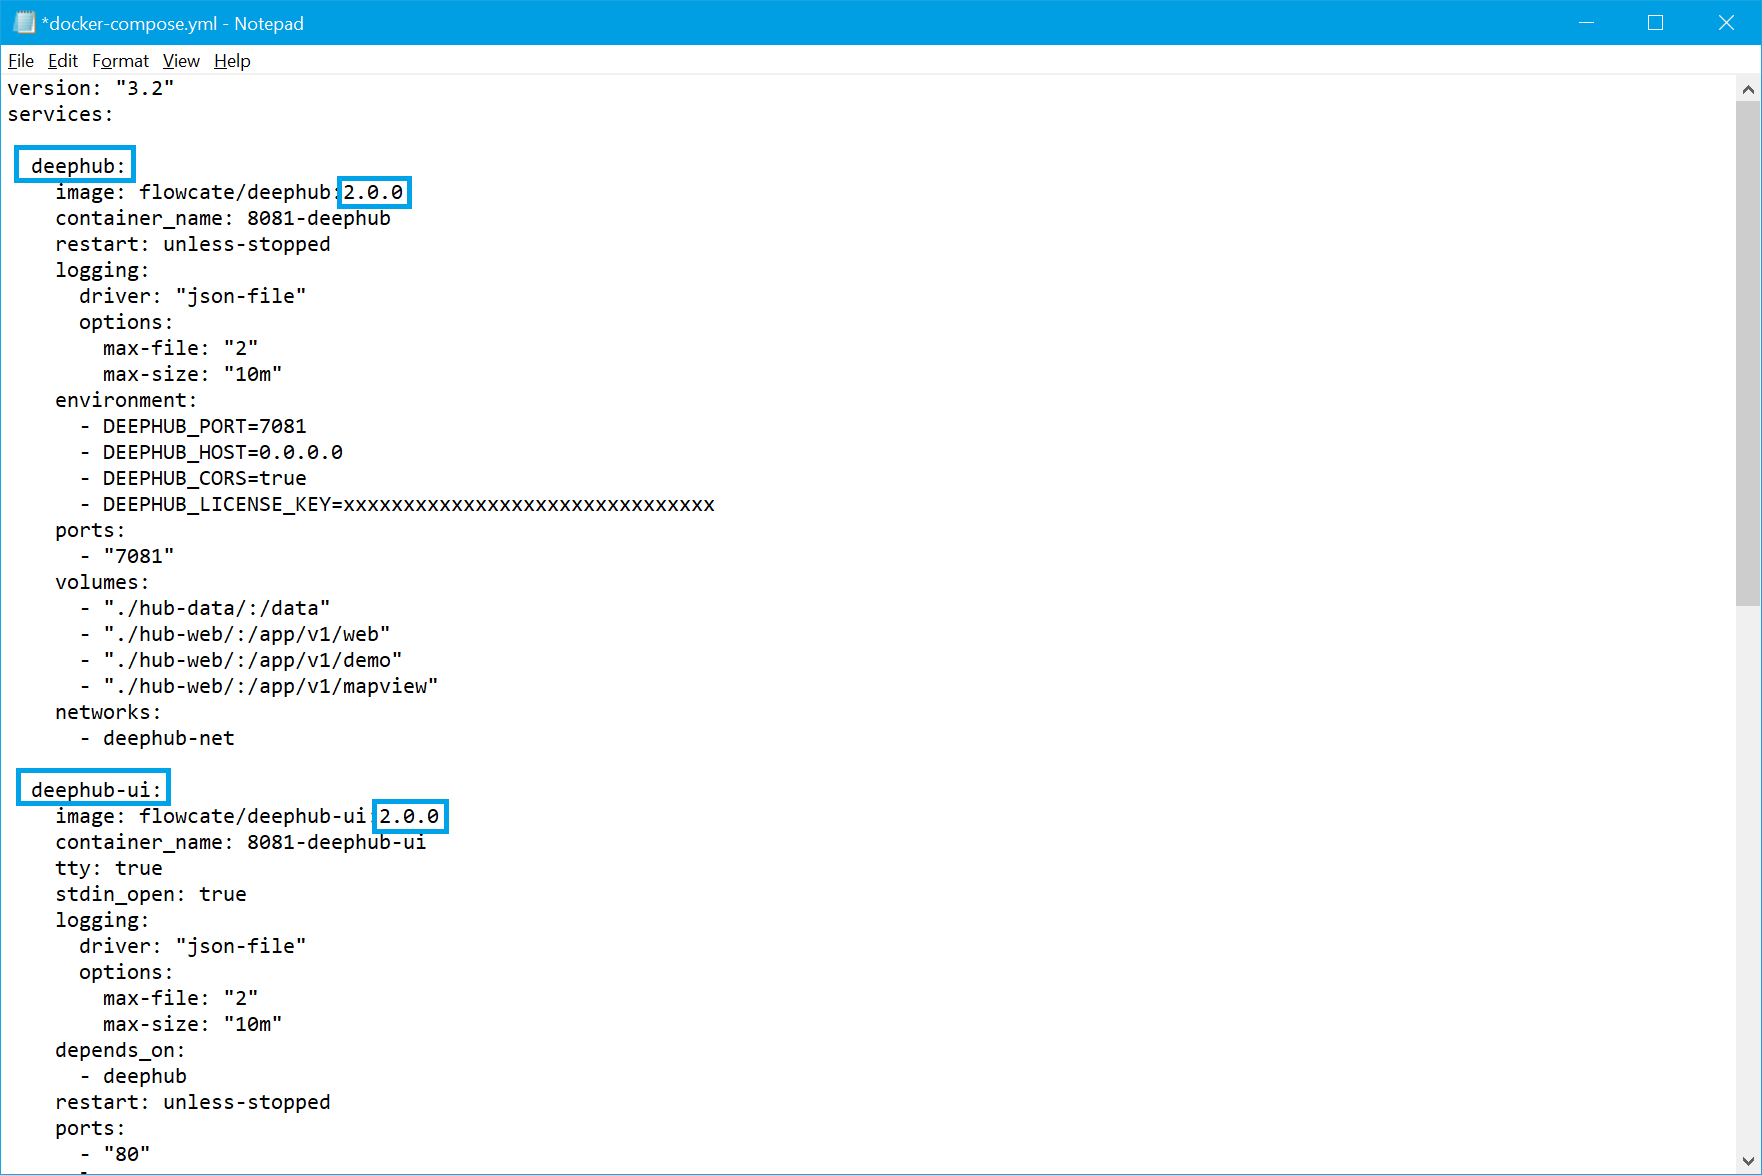
Our Docker Compose file consists of four "services":
- "deephub"
- "deephub-admin-ui"
- "deephub-apache"
Each corresponds to one Docker container (indicated by the name). Within each service section, Docker specific details can be configured as well as environment variables for the processes running within a container. Let's pick an example section:
deephub:
  image: flowcate/deephub:latest
  container_name: 8081-deephub
  restart: unless-stopped
  read_only: true
  logging:
    driver: 'json-file'
    options:
      max-file: '2'
      max-size: '10m'
  environment:
    - DEEPHUB_PORT=7081
    - DEEPHUB_CORS=true
    - DEEPHUB_LICENSE_KEY=50f7eb6d-4b4c-4a7b-8d60-0c439328214c
    - SQLITE_TMPDIR=/data
  ports:
    - '7081'
  volumes:
    - './hub-data/:/data'
  networks:
    - deephub-net
First of all, there is the service name. In this case, it is "deephub". Next are Docker specific parameters, such as the image name and tag, the name of the container that is built from it, the restart policy, and whether the container should run in read-only mode. If the latter is set to "true", no process running within the container is allowed to write to the Docker container's own filesystem. Next there are Docker parameters for logging.
The environment key begins the section containing the environment variables that are made available within the Docker container. You'll notice DeepHub-specific ones, of course, such as the port on which the DeepHub should listen. All DeepHub-specific environment variables start with DEEPHUB, an underscore, and the capital spelling of the parameter as specified in the "Server Configuration" section further down this documentation. Note the SQLITE_TMPDIR variable: it is necessary to specify a path to which the SQlite DB can write temporary information. The path has to be a known path from the point of view of the container and has to be writable.
Note concerning the port number specified: this is the port number within the docker container. It is not necessarily identical to the port on which the process is reachable from outside of the container though. It is the following section called ports that make this port available from the outside. In this case, it is the same port as the DeepHub process uses within the container. Instead of that simple entry, a "port mapping" could have been specified. The latter is nothing more than specifying the outside port number and the corresponding inside port number to which it should be mapped. For more details please refer to the Docker and Docker Compose documentation.
The volumes section is important to mention because it presents the mapping/mounting of external directories to container internal ones. In the example above, the external/host directory called "hub-data", relative to the location of the docker-compose.yml, is mapped to the absolute path /data within the container. The read-only container can write to this external directory in case the user and group permissions on the host filesystem are set appropriately.
Start a DeepHub®
- Open a shell (PowerShell or Command Prompt on Windows, a terminal on Linux or macOS)
- Change to the directory where your docker-compose.yml file resides. Docker Compose won't work if invoked outside this directory.
- Invoke Docker Compose. It will take a few minutes to download the Docker images and set up the DeepHub®.
Example:
cd <directory where the docker-compose.yml is>
docker compose up -d
On Linux, it may be necessary to call docker compose as superuser via the sudo command.
Now you have your own running DeepHub® instance that can be accessed with any modern web browser at the address: http://localhost:8081
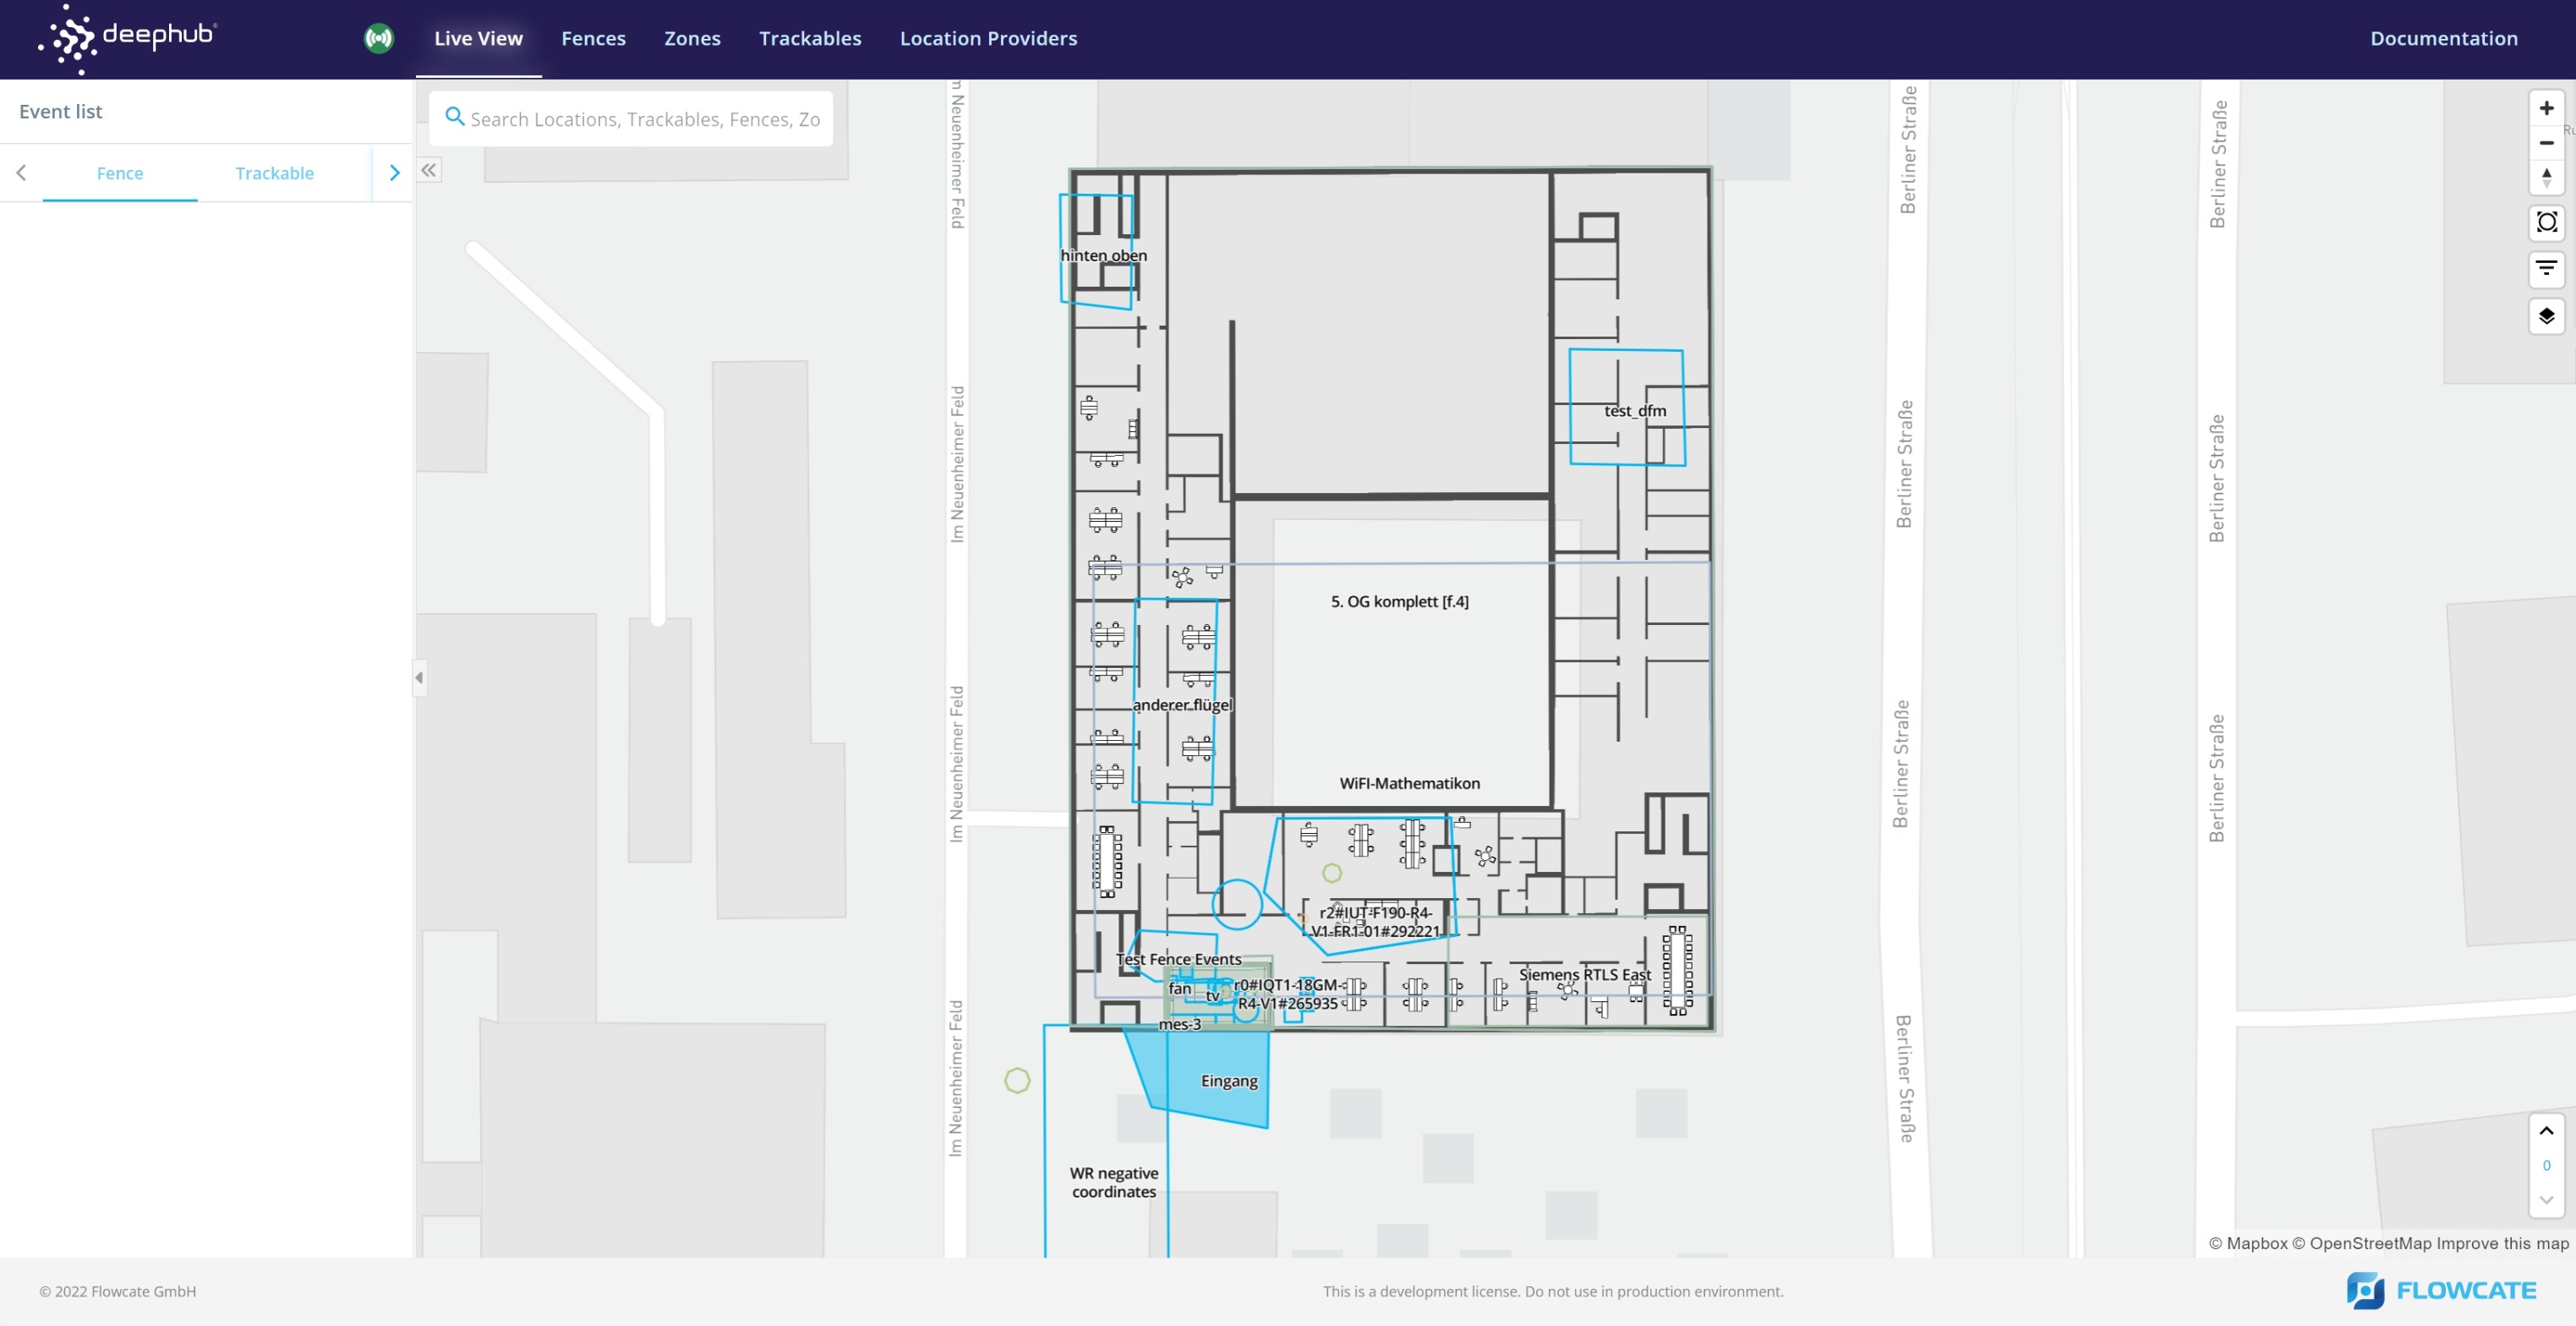
To complement the DeepHub UI shown above, you may also make API calls to the DeepHub REST API while running the DeepHub locally. This can be done with a tool such as Postman or cURL.
The containerized web server included in the Docker Compose bundle acts as a reverse proxy - forwarding requests to either the DeepHub UI or DeepHub containers.
To interact with the REST API, you will need to use the following baseURL: http://localhost:8081/deephub/v1
For example, retrieve an array of all zones:
curl http://localhost:8081/deephub/v1/zones/summary | json_pp
Stop a running DeepHub®
Please make sure you are in the same directory where you invoked docker compose.
To stop a running DeepHub®, execute 'docker compose down'. This ensures the running DeepHub® is stopped and allows the user to modify the configuration data.
cd <directory where the docker-compose.yml is>
docker compose down
On Linux, it may be necessary to call docker compose as superuser via the sudo command.
Install Specific Version
It is possible to switch to a specific version of the DeepHub® instead of the latest one, if required.
Before installing a specific version of the DeepHub®, it is mandatory to stop a running DeepHub as described above.
Pulling Specific Containers
Open the “docker-compose.yml” file. Edit the version of the DeepHub® from “latest” to the desired version. For example, it can be modified from "latest" to “2.0.0”. Similarly, the version of DeepHub® UI can be adapted accordingly.
Now, the specified version is pulled when executing the following command:
docker compose pull
To start the pulled version, use the typical command described above in Start a DeepHub®.
DeepHub® UI Configuration
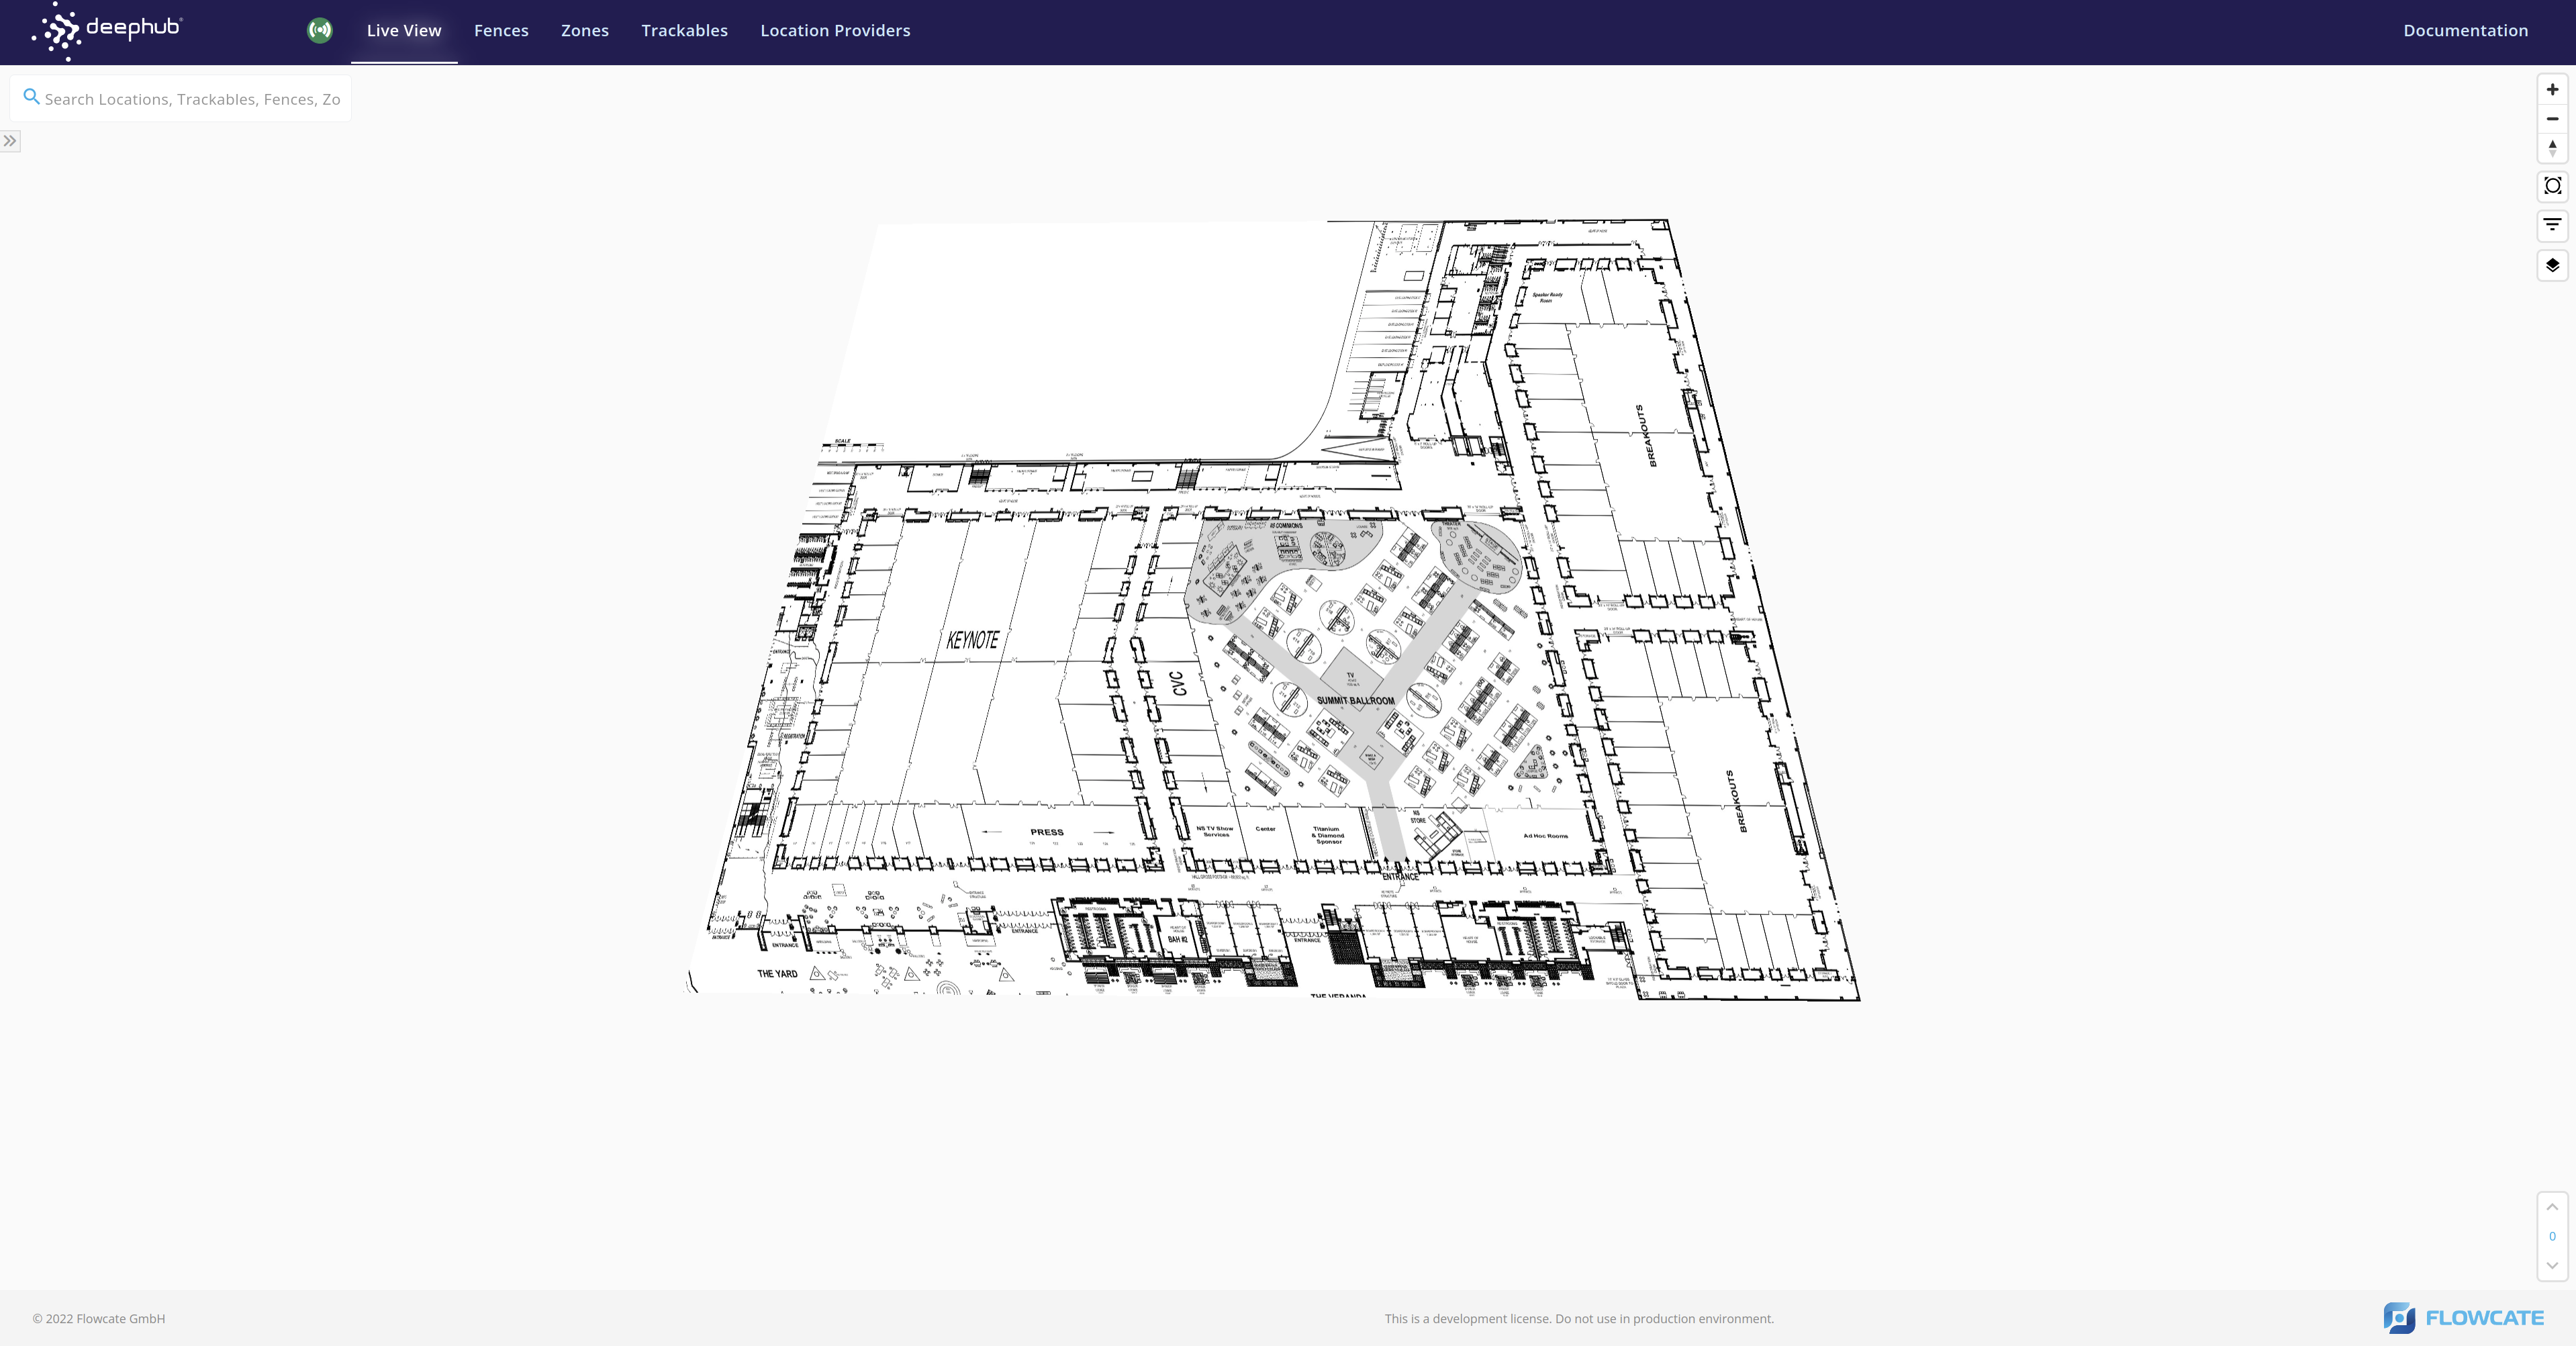
Adding a Floorplan Image to the Map
The DeepHub UI can be configured so that a floorplan image of a building or a site can be displayed. You may choose to display the image by itself, or overlayed on top of the basemap of the mapping service provider (ex. MapTiler).
To begin, you will need to determine the latitude and longitude of your floorplan images' corners.
Once this is done, navigate to the '/hub-web/nginx/webapp' directory of your DeepHub bundle on your local filesystem. Create a new directory (ex. named 'floorplan-image') and add your floorplan image to this directory.
Next, download the Open Sans Semibold font by cloning this repository to your local filesystem. Follow the steps in the README.md to install the required packages and generate the fonts. The fonts will be in the '_output' directory.
Your machine will need Node.js installed to generate the fonts.
user@fc:~/projects/fonts/_output$ ls
'Metropolis Black'               'Metropolis Light'             'Metropolis Thin'         'Open Sans Extra Bold Italic'  'PT Sans Bold Italic'       'Roboto Black Italic'            'Roboto Condensed Regular'  'Roboto Thin Italic'
'Metropolis Black Italic'        'Metropolis Light Italic'      'Metropolis Thin Italic'  'Open Sans Italic'             'PT Sans Caption Regular'   'Roboto Bold'                    'Roboto Italic'
'Metropolis Bold'                'Metropolis Medium'            'Noto Sans Bold'          'Open Sans Light'              'PT Sans Caption Web Bold'  'Roboto Bold Italic'             'Roboto Light'
'Metropolis Bold Italic'         'Metropolis Medium Italic'     'Noto Sans Italic'        'Open Sans Light Italic'       'PT Sans Italic'            'Roboto Condensed Bold'          'Roboto Light Italic'
'Metropolis Extra Bold'          'Metropolis Regular'           'Noto Sans Regular'       'Open Sans Regular'            'PT Sans Narrow Bold'       'Roboto Condensed Bold Italic'   'Roboto Medium'
'Metropolis Extra Bold Italic'   'Metropolis Regular Italic'    'Open Sans Bold'          'Open Sans Semibold'           'PT Sans Narrow Regular'    'Roboto Condensed Italic'        'Roboto Medium Italic'
'Metropolis Extra Light'         'Metropolis Semi Bold'         'Open Sans Bold Italic'   'Open Sans Semibold Italic'    'PT Sans Regular'           'Roboto Condensed Light'         'Roboto Regular'
'Metropolis Extra Light Italic'  'Metropolis Semi Bold Italic'  'Open Sans Extra Bold'    'PT Sans Bold'                 'Roboto Black'              'Roboto Condensed Light Italic'  'Roboto Thin'
Within your newly-created 'floorplan-image' directory, create a new directory named 'fonts'. Copy the 'Open Sans Semibold' font from the repository you just cloned to this new 'fonts' directory.
Displaying a Floorplan Image by Itself
Create a JSON file in your 'floorplan-image' directory that defines your map style. To display the floorplan image without the surrounding basemap, your file must be structured like the following:
{
  "version": 8,
  "id": "floorplan-style",
  "name": "Floorplan Style",
  "attribution": "Floorplan map",
  "glyphs": "floorplan-image/fonts/{fontstack}/{range}.pbf",
  "sources": {
    "image": {
      "type": "image",
      "url": "floorplan-image/<YOUR FLOORPLAN IMAGE FILE>",
      "coordinates": [
        [-115.16786551712569, 36.11988219161837],
        [-115.1654992, 36.119895],
        [-115.1649202, 36.118001],
        [-115.1684502, 36.118023]
      ]
    }
  },
  "layers": [
    {
      "id": "background",
      "type": "background",
      "paint": {
        "background-color": "rgba(0,0,0,0)"
      }
    },
    {
      "id": "image-layer",
      "type": "raster",
      "source": "image",
      "paint": {
        "raster-fade-duration": 0
      }
    }
  ]
}
You will need to change the coordinates in your JSON file to match the coordinates of your floorplan images' corners. The first coordinate corresponds to the top left corner of the image, the 2nd coordinate corresponds to the top right corner of the image, etc.
Finally, the 'deephub-ui' service within the docker-compose.yml file of your DeepHub instance needs to be modified:
- Set DOCKER_MAP_DEFAULT_STYLE=floorplan-image/YOUR MAP STYLE JSON FILE
- Ensure that the "./hub-web/nginx/webapp/" volume on your local filesystem is mounted to "/webapp" of the Docker container
Start your DeepHub instance by invoking Docker Compose. When you open the DeepHub UI in your browser, you will need to modify the URL by including one pair of latitude and longitude coordinates. For example, to navigate to the location of the floorplan image in the example above, the following URL would be used:
http://localhost:8081/deephub-ui/map/system/live/(show//left:list)?lng=-115.16786551712569&lat=36.11988219161837&zoom=17
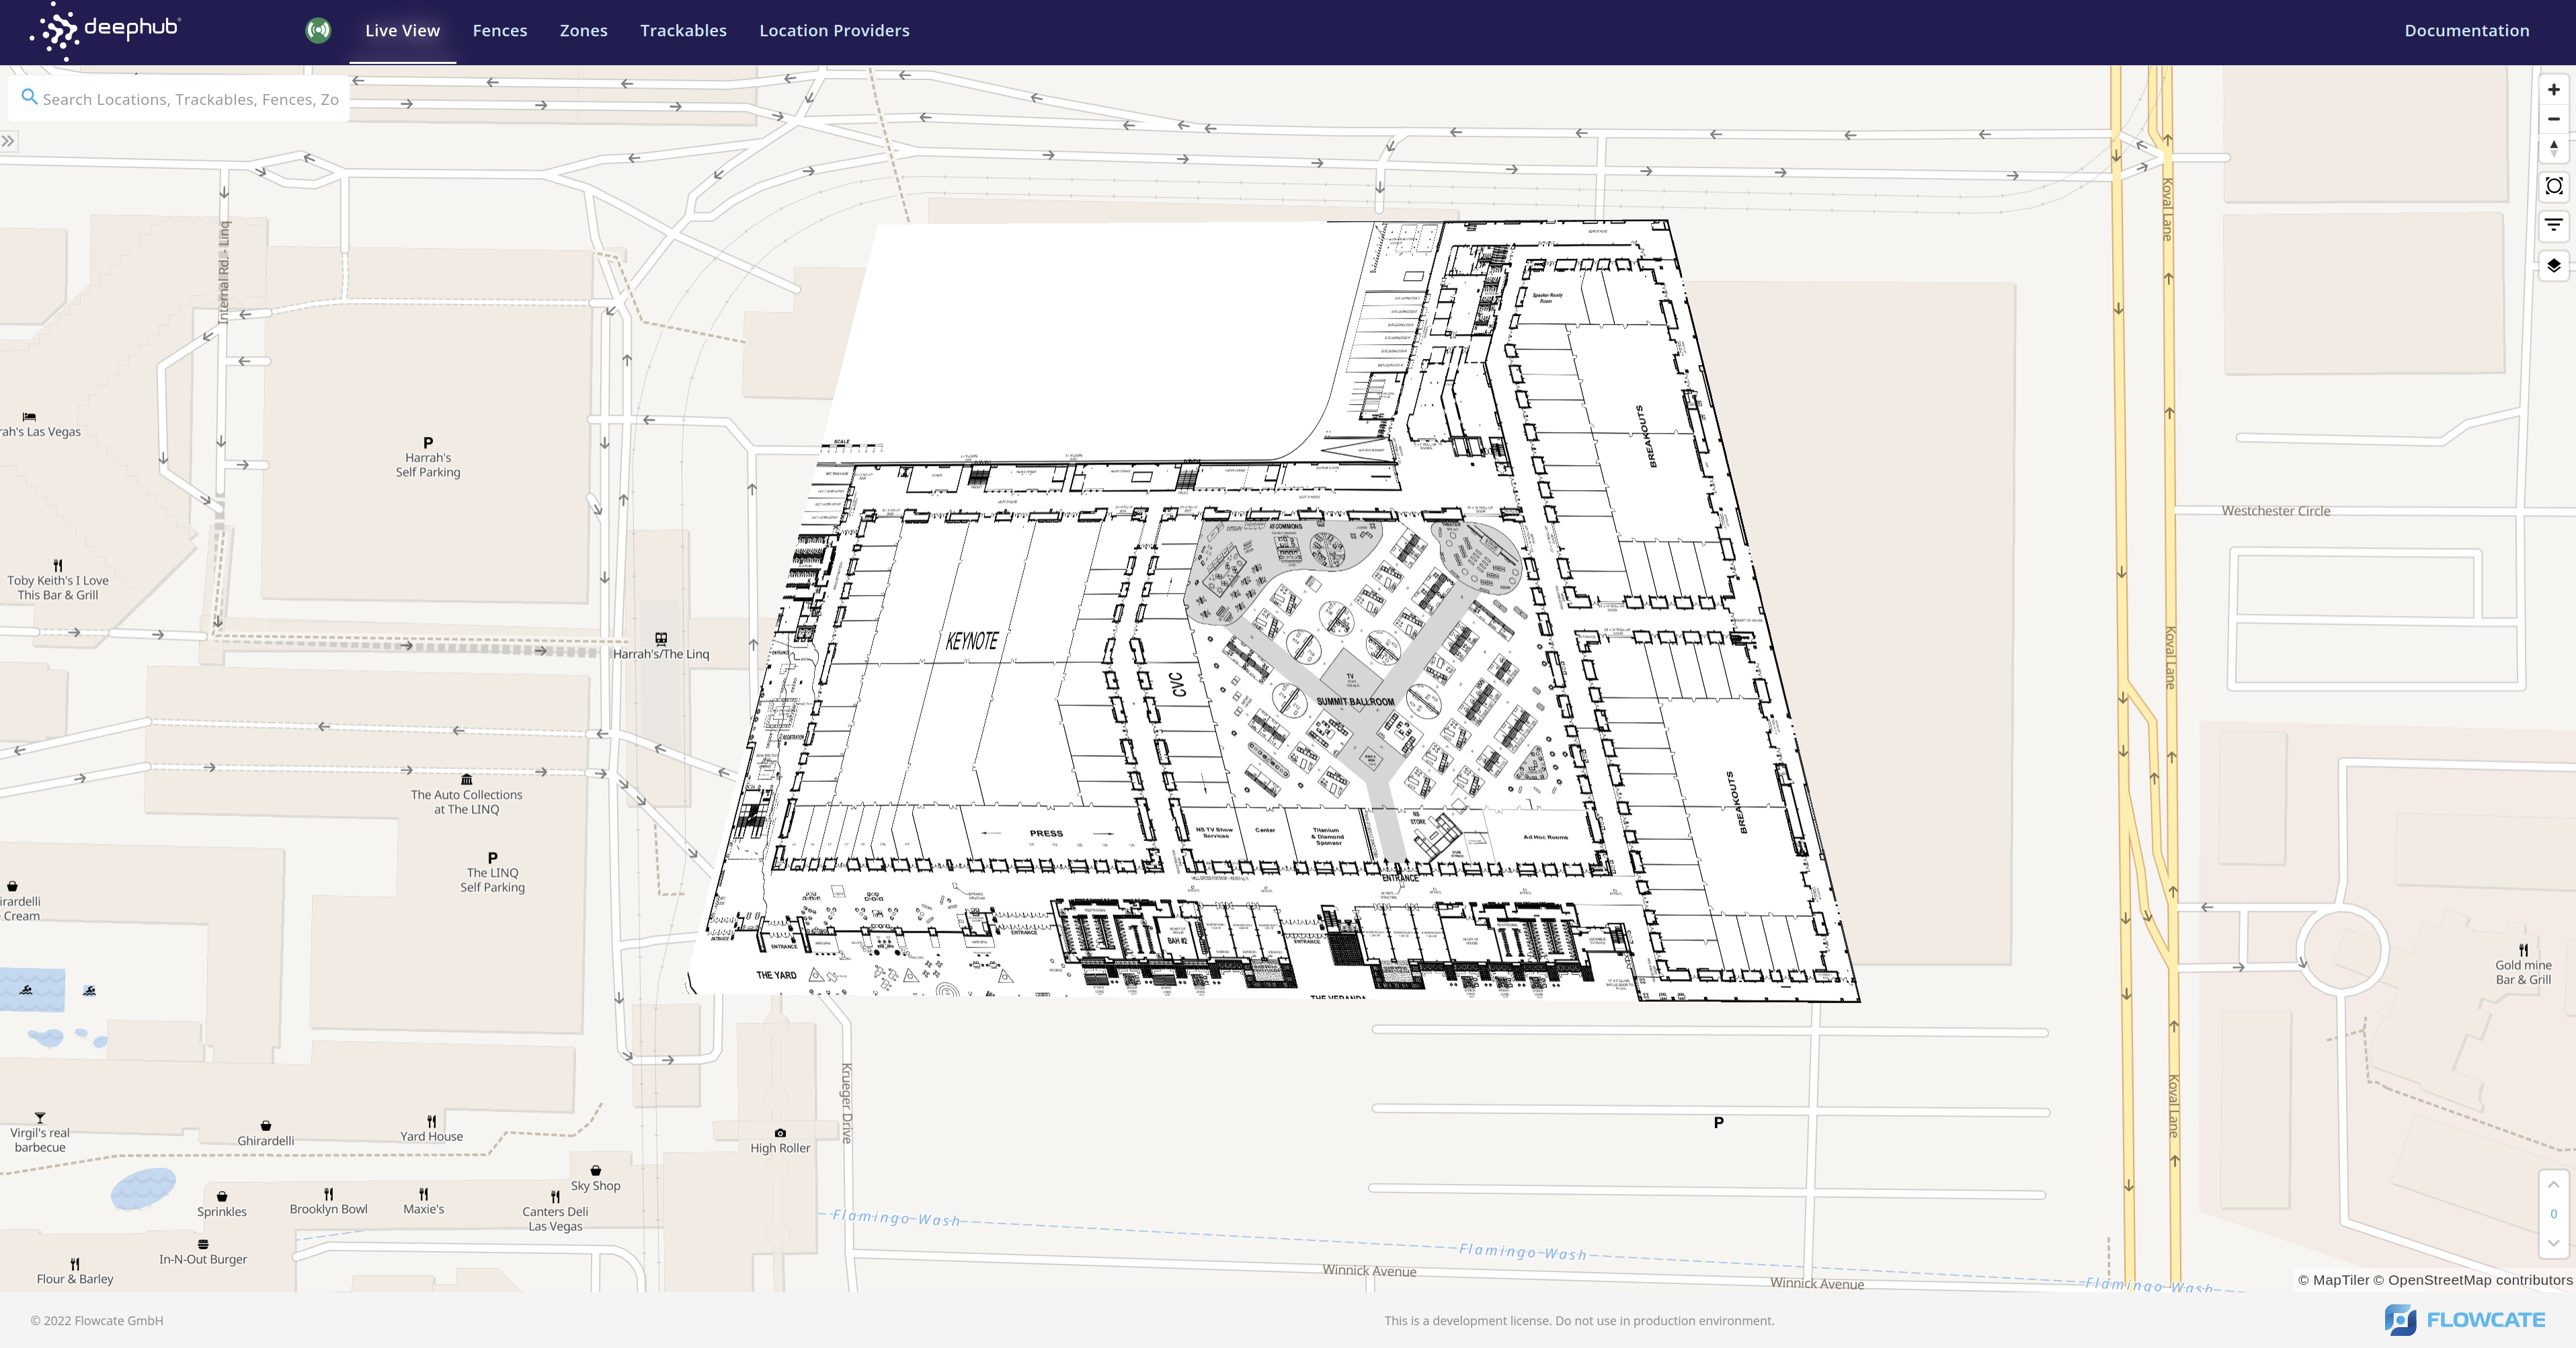
Displaying a Floorplan Image over a Basemap
To display your floorplan image on top of a basemap from a mapping service provider, you will need to modify your JSON file above, or create a new one.
Combine the properties associated with your floorplan image with the map style JSON of the mapping service provider. By default, MapTiler is used as the mapping service provider with this map style: https://api.maptiler.com/maps/bright/style.json.
In addition, you will need to ensure that the docker-compose.yml file of your DeepHub instance has the correct value for DOCKER_MAP_DEFAULT_STYLE. This environment variable should point to the location of the updated map style JSON file on your local filesystem. For example:
- DOCKER_MAP_DEFAULT_STYLE=floorplan-image/YOUR UPDATED MAP STYLE JSON FILE
Multi-Level Floorplans
If the building or site has multiple floors, you will need to include a floorplan image for each individual floor.
Your DeepHub instance will need to have zones, fences, trackables, or location providers on each floor that needs to display a floorplan image.
As described above, you will first need to determine the latitude and longitude of the corners of each floorplan image and ensure each floorplan image is included in the 'floorplan-image' directory.
Modify your map style JSON by including "minlevel" and "maxlevel" as properties. By default, the map starts at floor 0.
For example, to display a two-floor building without the surrounding basemap, your map style JSON would be structured in the following way:
{
  "version": 8,
  "id": "floorplan-style",
  "name": "Floorplan Style",
  "attribution": "Floorplan map",
  "glyphs": "floorplan-image/fonts/{fontstack}/{range}.pbf",
  "sources": {
    "floor0": {
      "type": "image",
      "url": "floorplan-image/<YOUR FLOORPLAN IMAGE FILE FOR FLOOR 0>",
      "coordinates": [
        [-115.16786551712569, 36.11988219161837],
        [-115.1654992, 36.119895],
        [-115.1649202, 36.118001],
        [-115.1684502, 36.118023]
      ]
    },
    "floor1": {
      "type": "image",
      "url": "floorplan-image/<YOUR FLOORPLAN IMAGE FILE FOR FLOOR 1>",
      "coordinates": [
        [-115.16786551712569, 36.11988219161837],
        [-115.1654992, 36.119895],
        [-115.1649202, 36.118001],
        [-115.1684502, 36.118023]
      ]
    }
  },
  "layers": [
    {
      "id": "background",
      "type": "background",
      "paint": {
        "background-color": "rgba(0,0,0,0)"
      }
    },
    {
      "id": "floor0-layer",
      "type": "raster",
      "source": "floor0",
      "paint": {
        "raster-fade-duration": 0
      },
      "minlevel": 0,
      "maxlevel": 1
    },
    {
      "id": "floor1-layer",
      "type": "raster",
      "source": "floor1",
      "paint": {
        "raster-fade-duration": 0
      },
      "minlevel": 1,
      "maxlevel": 2
    }
  ]
}
The value of the "minlevel" property corresponds with the floor upon which the floorplan image is displayed in the DeepHub UI. The value of the "maxlevel" property is always the subsequent floor.